

How to Use Mica Powder in Soapmaking: Quick Tips
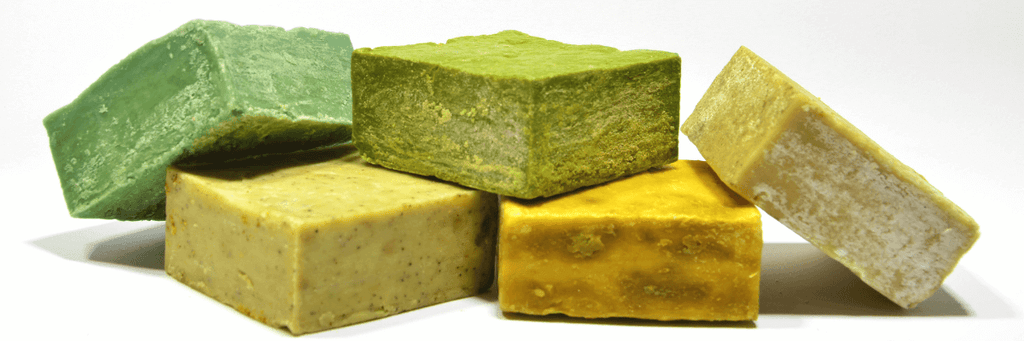
What’s the best colorant for homemade soaps? It’s mica powder! Mica powder is easy to use, and quickly adds vibrant, shimmering colors to both melt-and-pour and cold process soaps. Fortunately, there’s an endless variety of mica colors available, allowing you to create bold, colorful hues that match the scent of your bars.
Ready to get started coloring your soaps with mica powder? This guide will answer all the questions you have about using mica in soap, including:
- How to mix mica powder in soap?
- How much mica to use for soapmaking?
- How to avoid color bleed with mica?
- What are some techniques for using mica in soapmaking?
Keep reading to get tips and tricks for creating vibrant, glimmering hues in your homemade soaps.
Why Mica Powder is the Best Colorant for Soap
Mica powder is a natural mineral that’s known for its iridescent properties. Micas have a natural metallic glimmer, and they’re one of the most useful and safe colorants for soap. Mica works well in soap for a few reasons:
Now that you have an idea of why mica is so useful for coloring homemade soap, we’re going to get into how you can mix it and how much mica you should use.
Learn more about mica powder. See: What Is Mica Powder and What Is It Used For?
How Much Mica Should I Use in Soap?
If you’re new to working with mica powder, know that a little bit goes a long way. You can oversaturate colors if you use too much, and the result will be a grainy bar or a soap that doesn’t cure correctly.
To avoid color oversaturation, follow these guidelines:
Melt-and-Pour Soaps
When working with melt-and-pour soap, aim for 1 teaspoon of mica powder per pound of soap. If you want a more pastel hue, you might use less than 1 teaspoon, or if you want an opaque hue, start with 1 teaspoon, and then add one-quarter teaspoon of mica until you reach the desired color.
Cold Process Soaps
When coloring cold-process soaps with mica, start by dispersing the mica in a lightweight oil like almond oil. (Glycerin and isopropyl alcohol work too.) Add 1 teaspoon of mica to 1 tablespoon of oil, and blend until the mixture is smooth without any clumps. Then add 1 teaspoon of this mixture to your soap at a time until the color is just right.
Why Pre-Mix Your Mica?
With both soap-making methods, but especially with cold process soaps, pre-mixing mica usually works best. Color speckling is common when the mica isn’t evenly dispersed in the soap base, and the color might appear blotchy or uneven.
By pre-mixing the mica, you’ll prevent clumping and can better mix it in with your soap batter. Oils, glycerin or alcohol work best for pre-mixing, as mica isn’t soluble in water.
Using Mica Powder in Melt-and-Pour Soaps
Mica works great in melt-and-pour soaps, and the coloring process is super easy. Here are three quick steps:
-
Step 1: Heat the Soap Base - Melt down the butters and oils, until you’ve reached the desired consistency. Don’t overheat the base, though. If the liquid is too thin, the mica will sink to the bottom.
-
Step 2: Add Mica or Your Dispersion - You can add mica powder directly to the melted soap base or add your pre-mix. As you pour in the mica, begin to stir to help the mixture thicken. Continue mixing the mica and soap until it’s evenly distributed. If you’d like a darker color, add one-quarter teaspoon at a time.
- Step 3: Allow the Soap to Cure - Follow your recipe for curing steps. And voila! It’s that easy.
Quick Tip: Clear soap bases work best when working with mica powder, and will result in the most vibrant colors. White or off-white bases work well too, but the colors may morph slightly. For example, a red mica in a white soap base might result in a more pastel or pinkish hue.
How to Color Cold Process Soap with Mica Powder
Start first by choosing the right colors for cold-process soap. In particular, choose a natural or synthetic mica that has been colored with natural oxides. Choose natural micas that aren’t colored with soluble dyes to avoid color morphing.
Adding mica to cold process soap is similar to the melt-and-pour process. Follow these steps:
-
Step 1: Pre-Mix Your Mica - Mix a small amount of mica (1 tsp) in with a carrier oil (1 Tbsp), glycerin or alcohol. If the color looks right, you’re ready for Step 2.
-
Step 2: Create the Base - Follow your soap recipe. Your goal should be a fully liquid base.
- Step 3: Add in the Mica - Add in your mica dispersion, starting with 1 teaspoon per one pound of soap. Mix thoroughly. At this point, if you’d like a darker color, add one quarter teaspoon in at a time, until the base is the color you want.
- Step 4: Allow to Cure - Now your soap is ready to cure. Follow your recipe for curing steps.
One Tip: With cold process soaps, it’s best to try testing colors in a smaller batch first.

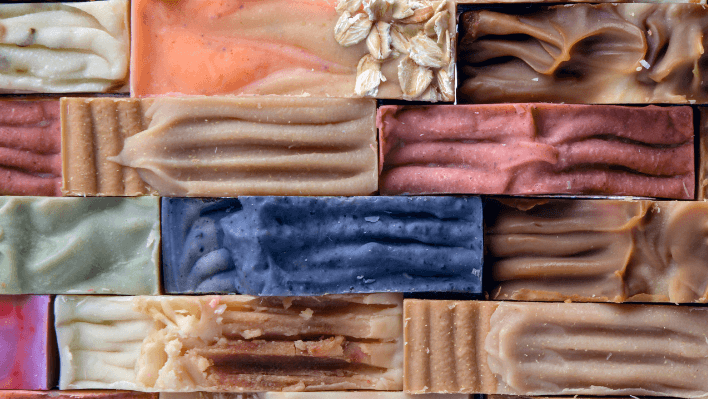
6 Techniques for Using Mica Powder in Soaps
Mixing mica powder in your base will result in an even color throughout, but there’s so many different ways you can use mica powder in soapmaking. We’ve highlighted other ways you can use it creatively:
-
Pencil Lines - Pour a layer of soap, and then carefully dust the top with mica powder. Then, pour another layer over the top. The result is a cool marbling effect, with a rich mica powder vein running through the middle of the soap.
-
Paint Piping Bags - Create a mixture of mica and oil, and then coat the inside of a piping bag with the mica. Fill the bag with soap batter and fill your molds. The result is a more subtle marbling effect with colorful swirls through the middle of the bar.
-
Drizzling Mica - Drizzle mica into your soap molds before filling them, and then again once they’re full. The outside of the bars will have vibrant color swirls and patterns, similar to a marbling effect.
-
Swirl in Colors - Create two or more mica-and-oil dispersions, and then add these to the top of a full mold. Swirl the colors into the soap base, using stir sticks. The bars will have colorful swirls throughout.
-
Dust Your Molds - This is perfect for silicon molds. Dust the bottom of the molds with a layer of vibrant mica powder. Then pour your soaps. The mica will adhere to the soap, resulting in a textured, colorful surface.
- Paint on Mica - Finally, you can paint mica directly onto cured soaps. This is especially useful for complex designs that require more detailed coloring.
Stock Up on Mica at Slice of the Moon
Excited to try these techniques in your next soap making project? Slice of the Moon offers a wide range of vibrant micas and glow in the dark pigments that are perfect for coloring melt-and-pour and cold process soaps. Shop our collections now:
Shop our Amazon.com Storefront or Contact Us for Bulk Orders